
So, Let me get this straight.
You bought a tanner that suits your needs. You got all dolled up and excited to use the lotion on yourself. But wait, where is the tanning mitt?
Did you forget to buy it?
If this sounds like you, don’t worry – in this article, we will cover the alternative ways you can get that perfect tan without a tanning mitt.
Even if you don’t have a tanning mitt, we highly recommend you to get one for yourself. (as it’s the best and cheap way to apply tan on your body).
We recommend St Tropez applicator mitt(amazon). We also have a dedicated guide on finding the best option. You can check it out here.

- Perfect streak-free results and stain-free hands every time.
- its water-resistant barrier will ensure there is no staining to the palms.
- Model Number: 100013063
Simple Ways to Apply Tanners without a Mitt
The self-tanner mitts will give you tons of confidence during application, so when you learn to utilize them properly. However, numerous people like using their hands, and that is a completely valid choice but this leads to having orange hands as a result. There are other ways to do it though, as we will find out in this article.
There are some tools you likely already have in your house, which can replicate the effects of using a tanning mitt.
Using a Rubber Glove

- Natural Latex Material: Gloves Legend Yellow Kitchen Gloves are made of natural Latex. They are...
- Anti-Slip Design: Gloves Legend yellow kitchen gloves embossed grip texture on palm and fingers to...
- 12” Length for Extra Protection: Gloves Legend yellow kitchen gloves’ extended-length cuffs (12...
This might sound silly when you hear it for the first time, but it actually does work quite well for many people – with a few people actually preferring it to tanning mitts. This is due to a number of reasons, but for most people, it is because self-tanner mitts tend to absorb some of the tanning solution or lotion, especially the longer you use them. This will tend to lead to uneven application.
One benefit of using rubber gloves(We like this one) is that they do not absorb the tanning product you are using, and that allows you to get the maximum benefits from the product.
In addition, the use of gloves will allow you to reach the places on your back that are harder to reach, unlike tanning mitts, because of the presence of finger holes. You can also wash off the tanning product afterward due to the material being rubber, especially if the product itself does not contain a guide color or bronzer.
None of the products will actually get to your hands either, so you will not need to worry about scrubbing your hands afterward to get the annoying orange color.
Using Socks to Apply the Tanner

- WHY CHOOSE RED ?--Red, is a bright color, a symbol of happiness. Since ancient times, every...
- STAY IN PLACE--The back grip keeps the sock in place & it doesn't end up under your foot.We have...
- WELL MADE CUFF--Our socks’ cuff will neither too tight nor too loose, it’s designs fit the human...
Aside from gloves, this is another fan-favorite method of applying self-tanners. In fact, numerous socks can work as well as a tanning mitt, which allows you to apply the self-tanner without the risk of soiling your hands.
Make sure to turn the sock inside out, then apply the tanner on your skin and use the sock to spread it out. When you use it, you might notice that the tanner spreads out more evenly compared to the rubber glove method, since the fabric itself will hold some of the product always.
Many women saying that they like using slipper socks to apply the self-tanners. This is likely because of their thickness, which will protect your hands better than if you were to use normal socks. They are also generally inexpensive, and you can replace them after using them a few times.
One thing to note always is being careful with the socks you decide to use – if you use a certain pair, never use them again on your feet, unless you want to have orange feet. Even after washing them, there is some product that will always be left on them, and it can be quite embarrassing when you wear them.
Use Hands
With the advice we have given in the points above, the idea of using hands is scary and intimidating. After all, you do not want to end up with orange hands while the rest of your body is a different color. However, this is how many people apply the tanning products on their skin in the starting days, and everyone is still fine with it.
What you might not know is that it is quite easy to use your hands to apply the tanner, but you need to ensure that you do it the right way. You first do the normal routine of preparing the skin – exfoliating (Check our complete guide), shaving, moisturizing, and so on.
This is the exfoliation scrub we recommend
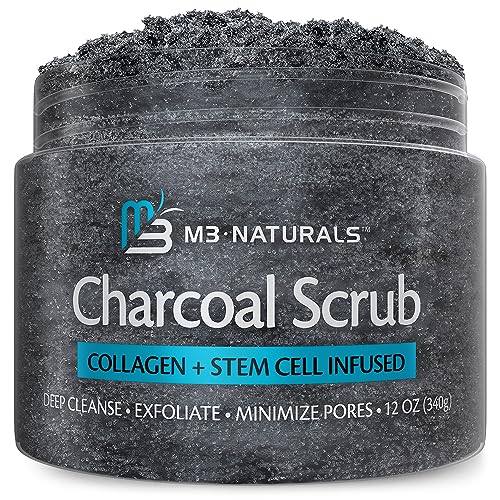
- M3 Activated Charcoal Body Polish Scrub: Provides a quality exfoliating experience as a body scrub,...
- Infused with Collagen and Stem Cell: Our moisturizing charcoal scrub will take your skin care...
- Help Reduce Skin Blemishes: Whether you choose to use our natural charcoal as a face scrub or body...
After this, you then apply self-tanner in your hands and spread it liberally throughout your entire body (not just your back). For any dry areas in your body, minimize the amounts of self-tanner that end up in these areas.
Once you are through, wash your hands immediately. The best way is through rough exfoliators, such as sand or sugar scrubs. Make sure to rub it as vigorously as possible before the tanner even has time to settle in, and the chances of having tanner on your hands will be low.
Once you are through, wash your hands immediately. The best way is through rough exfoliators, such as sand or sugar scrubs. Make sure to rub it as vigorously as possible before the tanner even has time to settle in, and the chances of having tanner on your hands will be low.
Cling film
This sounds very strange when you first hear it (yes, we thought it was weird too), but it is one of the underrated methods of applying self-tanners – it works much better than you might think. You just need to take some simple cling film wrap, wrap film around your hand completely, and you instantly have a tanning mitt.
Ensure before application that you wrap the film very well to avoid exposed spots, but avoid making it too tight – you do not want to cut off blood circulation! Since the cling wrap is quite smooth in texture, it will also apply the self-tanner very well and evenly.
Consider Trying Self-Tanning Wipes
No products found.
Self tanning wipes are increasing in popularity greatly as time goes by, and they are a fantastic alternative to what you already have. They can work for you in case you do not have tanning mitts and none of the other options are exciting to you.
Here is a good one on amazon. We also have a dedicated guide to finding the best self tanning wipes here.
In fact, there are plenty of people that advocate for their use, and there are popular brands you can check in the market today.
The basic premise of these wipes is a self-tanner of high quality that is in the form of a towelette. However, in the long run, they are not quite as cost effective, so they are best if you need something quick for use in the short term. For instance, when you are traveling and need a tanning solution, or you need to get a perfect glow quickly just before heading out to an event.
Like the method of using your hands, you will need to wash your hands very well immediately afterward to avoid the problem of discoloration.
Also read – Best Self Tanner For Redheads
DIY Tanning Mitt tips and Preparation for Tanning
The truth is that the method you use to apply the self-tanner is not the major issue here, as it depends on your preferences. Instead, the results you eventually get will depend on the preparation before and the aftercare you use after getting your results – it will make a world of difference when you do it correctly.
Applying fragrance- and Oil-Free Lotion to the Skin
After your whole tanning process is done and you clean up, you need to pay some extra attention to certain areas such as the back of the heels, your fingertips and wrists, your knees, and the elbows. Since they tend to be drier than the rest of the skin, they also absorb more dye, which results in unevenness. If you have naturally dry skin or large pores on your face, then make sure to apply some moisturizer at least 20 minutes before you apply your self-tanner.
Use Masking Tape on the Bottom of your Feet if you are using Spray Tanners
Just in case you step on residue, you do not want to have orange feet for one to two weeks. Therefore, gaffer tape or painter’s tape are the best options to protect the skin due to their thickness, and they are easy to remove once you are done.
Always apply the Tanner in a Dry, Cool Area to Prevent Sweating
While it is very important to prepare your skin by exfoliating it before you apply the tanner, it is equally important to leave any steamy place before applying the product on your skin. The reason is that water, humidity and sweat will make the self-tanner break down very quickly, which makes a whole mess. Always do it in a cool place instead to stay dry.
Consider getting Washable Body Makeup
Self-tanners are amazing, and highly convenient. However, the idea of applying them on your skin might be very intimidating, such as when you are using them for the first time and do not want to make mistakes.
The good news is that you can use body makeup that you can wash off the next time you hop in the shower, or when you need a quick solution like a nice glow to the skin when you go out. You can also use them as a substitute for self-tanners, and you can wash them off when you get home and get back to makeup-free skin.
For you to Apply Tanner in your Knuckles, bend the Fingers to look like a Claw
When you think about it, it is very unnatural to walk around with your fingers completely straight for an entire day, so this will allow you to cover all the nooks in the body that you want to avoid showing, especially when moving around.
Skip the Ankles and Elbows when Applying the Tanner
Like we mentioned earlier, the skin in these areas is dry, so it will absorb more of the product. Instead, leave them alone when you are applying the tanner, and then you can brush the remnants lightly on them after you are done with the rest of the body. This will also prevent them from becoming too dark compared to the body.
Use a Sponge Brush and a Facial Self-Tanner on your Cheekbones
Facial skin is quite sensitive to handle, and it can be intimidating to apply self-tanners on it. however, just keep it concentrated on certain parts like the jawline, cheekbones, and the sides of the forehead then spread it lightly on the rest of the face.
Final thoughts
Regardless of the specific method, you use to apply your self-tanner, you can do it according to your preferences. Self-tanning mitts are the best course of action, but the tips above will still give you the same results as long as you use them well. just keep in mind that you will need to practice for quite a bit before you get it right – but as long as you prepare your skin well, choose a product that works well for your skin, and apply it as evenly as possible, the results will look amazing.
General tips for a perfect tan
It is important to first know what a self-tanner is before heading to apply it on your skin. Self-tanners, or sunless tanning products, come in the form of creams, lotions, and sprays, and are considered a safer method than sunbathing because they do not expose the skin to UV radiation. The other advantage is that you can apply them in the privacy of your home, and takes only minutes.
These products contain DHA, also known as dihydroxyacetone, which is the active ingredient. It works by reacting with the dead skin cells on the surface of the skin, and eventually changes the skin color to darker shades that end up looking like a tan.
The effect is only temporary though because the skin actually sheds dead cells off all the time. If you want to maintain the tan look, you will need to reapply the tanner every three days.
Further reading
Best Tanning Lotion For Fair Skin
Best long Lasting Self Tanners
Self tanning hacks – Cosmopolitan
How to self tan at home – Selftanning